
iCat resource
How to Document Contents for Insurance Adjuster Review
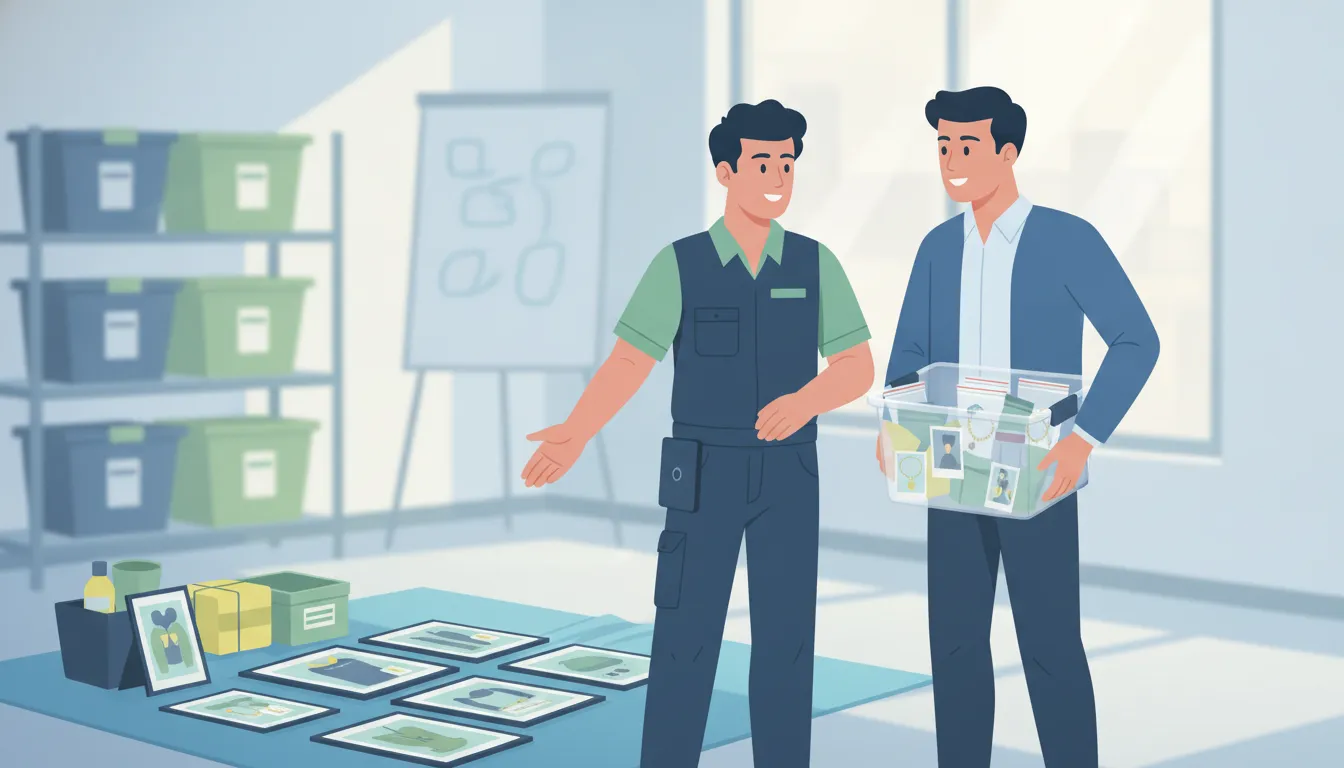
When a contents claim reaches an adjuster as a pile of unnamed photos, the review becomes a reconstruction exercise. A disciplined record connects each item to its room, condition, evidence, and valuation support before questions start coming back.
Call 1-888-494-4228 to learn more about iCat.
The practical answer to how to document contents for insurance adjuster review is to build an item-level file. The file should show what existed, what happened to it, what replacement cost is supported, and how age or condition affects depreciation.
Work room by room, link every line to clear photos and notes, and confirm carrier-specific requirements with the assigned adjuster. An accurate inventory gives an insurer information needed to help settle a claim, according to the National Association of Insurance Commissioners.
This guide follows that evidence from the first field photograph through the final searchable report. Start by identifying the information an adjuster needs to verify before reviewing values or status.
What Does an Adjuster Need to See in a Contents Claim?
An adjuster needs a clear evidence chain for each item, not a loose folder of photographs. For a contractor, the goal is to show what existed, what happened to it, what it will take to replace it, and how the record was assembled. An accurate inventory gives the insurer information needed to help settle the claim, while an incomplete inventory can delay processing. Requirements vary by carrier, policy, and jurisdiction, so confirm any specific submission format with the assigned adjuster.
Six questions every line item should answer
- Existence: What item was present? Use an item-level photograph and a specific description. Include identifying details such as make, model, or serial number when available.
- Causation: What happened to the item? Record the observed condition and relevant loss or damage observations. Keep those observations separate from the adjuster's coverage decision.
- Replacement cost: What comparable item supports the proposed replacement value? Tie the value to a receipt, record, or documented replacement-cost source rather than leaving an unsupported figure.
- Depreciation: What age and condition information supports the calculation? Report age accurately and apply a consistent approach within comparable item categories. The policy and adjuster determine how coverage and depreciation are handled.
- Completeness: Has the team captured every affected room, storage area, and relevant item? Work systematically so closets, drawers, garages, and sheds are not overlooked.
- Easy review: Can a reviewer move from the line item to its evidence without hunting through an unsorted photo folder? A structured, searchable, auditable record makes gaps and duplicates easier to identify.
The contractor owns the quality and organization of the documentation. The adjuster or carrier evaluates coverage under the applicable policy. Do not present a complete inventory as a coverage determination, and do not assume one carrier's preferred format applies everywhere. If the property may be discarded or materially altered, obtain the adjuster's direction first and preserve the available evidence.
For the broader workflow around claim records, evidence, and contractor controls, see this insurance documentation for contractors guide. This article narrows the focus to the adjuster-facing handoff: every line should be identifiable, supported, traceable, and ready for review.
How to Document Contents for Insurance Adjuster Review in the Field
A room-by-room workflow keeps the inspection controlled and gives every item a traceable place in the claim file. Confirm carrier or policy-specific requirements with the assigned adjuster before you begin, then use the following sequence for each area.
- Establish the scope before recording items. Confirm which rooms, closets, drawers, garage areas, and outbuildings are included. Work one room at a time and define a consistent direction through the space, such as left to right. Include garages or sheds where tools, lawn equipment, sporting goods, or other contents may be involved. This prevents overlooked areas and makes the finished inventory easier to audit. Room-by-room organization is also consistent with practical inventory guidance from the Texas Department of Insurance.
- Capture wide views before close-ups. Photograph or video the room from multiple positions before moving or cleaning anything. Then photograph each damaged item and the surrounding context. Take additional close views of damage, labels, serial numbers, and model numbers when they are visible. Open closets and drawers rather than treating closed storage as documented space. Damaged property should be photographed or videotaped before repairs begin, as recommended by the University of Florida IFAS guidance.
- Create the line item while the evidence is in front of you. Assign the item to its exact room or storage location, then describe it completely the first time it appears. Record quantity, type, brand, model or serial number when available, age, and visible condition. Do not use labels such as "electronics" or "furniture" when a more specific description is possible. Accurate age matters, so record what is known instead of concealing or guessing to improve the apparent value.
- Record condition and cause observations separately. Note what you can observe, including the affected component, extent of damage, and apparent relationship to the loss. Keep observations factual and distinguish them from coverage decisions. If an item remains available for inspection, preserve it and do not discard it without adjuster approval. A detailed list of lost or damaged property supports the subsequent review.
- Mark the item status and connect every photo. Identify whether the item is damaged, destroyed, removed for cleaning, pending inspection, or otherwise unresolved. Link the wide view, item image, detail image, and any supporting record to the same structured line item. Searchable computerized records help teams find and prevent duplicates, while a folder of unconnected JPEG files makes review harder.
- Preserve and review the field record. Before leaving, check the room against the scope, look for omissions, and confirm that each item has usable photos and a readable description. If connectivity is unreliable, continue offline and sync when Wi-Fi or cellular service returns. Back up the completed record safely away from the job site. A quick human review remains necessary for photo-derived descriptions because unclear or missed information must be corrected before submission.
What Should Each Line Item Include?
A strong contents record lets an adjuster understand one item without opening a separate folder or guessing what a photo shows. Build each line as a complete, searchable record. That structure is more useful than a collection of unlabelled JPEG files, and it makes duplicate checks easier before submission.
Identify the item and its location
Start with the room, area, and quantity. Use a specific location such as "kitchen, lower cabinet, left side" rather than only "kitchen." Record the item category and a complete description the first time it appears. For example: "Two-seat gray microfiber sofa, rolled arms, three cushions," not "couch." If several matching items are present. List the quantity and distinguish them with a location or identifying detail.
Capture details that distinguish one item from another
Add the manufacturer, model number, serial number, size, color, material, and other relevant identifiers. Record model numbers when the item remains available for inspection. Electronics and appliances may have identifying labels inside a door, on a rear panel, or in a drawer. Do not fill gaps with assumptions. If a detail is not visible, mark it as unknown and explain what was checked.
Include the approximate age or purchase date when known, along with the source of that information. Report age accurately rather than presenting an older item as new. Receipts, bills of sale, charge records, and prior evaluations can support the record. When those documents are unavailable, note the reported purchase location and date instead of leaving the valuation context blank.
Connect condition, cause, and status to evidence
Describe the observed condition in concrete terms: "water staining on the lower drawer and swollen particleboard," for example. Add the cause observation only when supported by the site findings. Such as "affected by water from the failed supply line." Avoid turning an observation into a coverage decision. Record the operational status, such as cleanable, pending inspection, non-salvage, packed, or disposed with adjuster approval. Carrier-specific fields and status labels can vary, so confirm requirements with the assigned adjuster.
Finally, attach photo references, video references, and supporting-record notes to the same line. A reviewer should be able to move from the description to the item image, damage detail, serial label, and value support without searching manually. For broader workflow context, see this contents restoration industry overview.
Which Photos and Supporting Evidence Strengthen a Contents Claim?
A strong contents file connects each line item to evidence an adjuster can review quickly. Photos establish what was present and show condition, while receipts, records, and process notes add context that a single image cannot provide. The exact photo set and submission format can vary by carrier, policy, and claim circumstances, so confirm any specific requirements with the assigned adjuster.
| Evidence type | Purpose | Common gap |
|---|---|---|
| Wide-room photo or video | Shows the room context and helps confirm where contents were located. | Closets, drawers, garages, or sheds are omitted. |
| Item-level photo | Connects a specific asset to its inventory line and visible condition. | Several items appear together without a clear item reference. |
| Detail or serial-number photo | Supports identification through make, model, serial, or other distinguishing details. | The identifying label is blurred, hidden, or never captured. |
| Condition or damage detail | Documents the observed damage before cleaning, repair, or other work begins. | The image does not show the condition that supports the recorded status. |
| Process and status evidence | Shows what happened to the item and preserves the record of cleaning, repair, storage, or non-salvage handling. | Status changes are recorded without a date, note, or supporting reference. |
Capture damaged property before repairs begin, and preserve the original files alongside the structured inventory. Available receipts, photographs, bills of sale, charge records, and other records can support the item and its value. If an item remains available for inspection, record its model number and describe its age accurately. A complete list should document and value every item, not just the items with the most obvious damage.
Disposal creates a special evidence risk. Do not discard damaged property without the adjuster's approval. When an item is classified as non-salvage, follow a documented process that preserves the reason, status, and related evidence. These non-salvage contents list steps can help keep that handoff organized.
Finally, link every image and supporting record to the correct line item. A searchable, item-level record is easier to audit than an unsorted folder of JPEG files, and it reduces the follow-up caused by missing or disconnected evidence.
How Should Contractors Document Replacement Cost and Depreciation?
Replacement cost and depreciation should be documented as two related but separate parts of an item record. The replacement-cost entry answers, "What would it take to replace this item with a comparable item today?" The depreciation entry explains the item's age, condition, and applicable adjustment. Neither entry is a coverage decision, and neither guarantees that a carrier will accept a particular value. Carrier and policy requirements vary, so confirm the expected format and methodology with the assigned adjuster.
Start with the observed facts before researching a value. Record the complete description, make, model, serial number when available, purchase date or estimated age, condition before the loss if known, and the damage or loss status. Product manuals can help fill in equipment details when the item is still available or the label is difficult to read. The University of Minnesota inventory guidance also identifies purchase date, original cost, and alterations or repairs as useful record fields. Keep receipts, photographs, repair records, and other supporting documents with the corresponding line item rather than in an unrelated folder.
Build a traceable replacement-cost record
For each item, record the replacement description, research source, access date, and the reason the selected product is comparable. Note meaningful attributes such as brand, model family, capacity, material, configuration, or included components. If an exact replacement is unavailable, explain the like-kind-and-quality basis instead of silently substituting a different item. Research replacement values for every damaged or destroyed item, and preserve the page, quote, receipt, or other evidence used to support the amount. Unsourced replacement costs commonly create follow-up requests during adjuster review.
Organize the evidence so a reviewer can move from the line item to its source quickly. A structured, searchable record is stronger operationally than a photo folder with no item-level relationship. If the work includes a non-salvage disposition, keep the valuation evidence and status history connected to the item. These non-salvage contents list steps provide related guidance on organizing that part of the workflow.
Apply depreciation consistently and visibly
Depreciation should follow a stated, repeatable rationale. Use the recorded age and observed condition, identify the category or method applied, and distinguish facts from assumptions. Similar items should receive similar treatment unless a documented difference supports another result. If age or condition is uncertain, flag the uncertainty for review rather than presenting an estimate as confirmed. Keep the original replacement research visible alongside the depreciation entry so the reviewer can understand how the figures relate.
iCat can assist by generating item descriptions, make, model, and value from photos. A technician or estimator still needs to review the output, correct missed or unclear details, and confirm that the result reflects the item shown. Its workflow can also support geo-located like-kind-and-quality research, age and condition assessment, custom depreciation logic, and sales tax by insured location. Treat those capabilities as documentation tools, not as an automated coverage or claim-acceptance decision.
What Makes a Contents Report Adjuster-Ready?
An adjuster-ready report is more than a completed spreadsheet or a large photo folder. It lets a reviewer move from the overall loss to each individual item without guessing what a photo shows. Whether an item was counted twice, or which value supports the line. The goal is a structured, searchable, auditable record that preserves the field team's work and reduces avoidable follow-up.
Use this final quality-control sequence before delivery:
- Reconcile the scope. Compare the documented rooms, closets, cabinets, garage, and other affected areas against the assigned scope and your field notes. Confirm that each area has been reviewed and that unusual quantities have a clear explanation. A room-by-room workflow helps expose omissions before submission.
- Remove duplicates and resolve gaps. Search the inventory for repeated descriptions, serial numbers, and photo references. A computer program's find function can help identify duplicate entries. Also look for orphaned photos, blank descriptions, missing condition notes, and items that appear in the images but not in the line-item record.
- Tie every line to evidence. Each item should be described as completely as possible the first time it appears. Link the line to the relevant overview and close-up photos, then include model or serial information when the item remains available for inspection. Where replacement values are included, retain the supporting source, receipt, or other available record rather than presenting an unsupported number.
- Flag unresolved items. Do not hide uncertainty in a polished report. Mark items that need client confirmation, further inspection, better photography, or additional valuation research. Separate observed facts from assumptions, and confirm any carrier- or policy-specific documentation requirements with the assigned adjuster.
- Preserve the status trail. Make the item's current status easy to understand, such as pending review, cleaned, repaired, non-salvage, or awaiting direction. Keep notes that explain what happened and when. Consistent status records give the adjuster context without forcing the reviewer to reconstruct the job from messages and disconnected folders.
- Deliver a searchable file. Before sending, open the final report as the recipient will see it. Check that sorting, filters, photo links, totals, and attachments work. A report that is easy to search and audit is more useful than an attractive document that leaves evidence scattered across folders.
This workflow complements the broader insurance documentation for contractors guidance, while keeping the focus on the final adjuster-facing handoff. For teams managing multiple jobs, contents restoration software can help standardize item records, preserve photo relationships, and produce reports in the format your workflow requires. Photo-derived descriptions and values still need human review, especially when an image is unclear or an item may have been missed.
Want to make adjuster-ready documentation easier to repeat across every job? Explore iCat's contents management workflow for restoration teams.
Next, use the following FAQ to address common questions about itemized records, evidence, and adjuster review.
How Can You Avoid Documentation Errors That Trigger Disputes?
Most documentation disputes start with small process failures, not complex estimating questions. A vague label, an image saved outside the claim folder, or a duplicate line can force an adjuster to ask for the same clarification twice. Incomplete inventories can delay claim processing, while unsorted photo folders make review difficult. This contents restoration process guide can help teams build a repeatable field workflow, but the controls below keep the focus on contractor execution rather than legal advice. Confirm carrier or policy-specific documentation requirements with the assigned adjuster.
Control the common failure points
- Replace vague labels. "TV," "chair," or "box of items" does not give a reviewer enough context. Describe each item as completely as possible the first time it appears, including identifying details that distinguish it from similar items. Where an item remains available, look for its model number. These practices support a clearer item-level record. Source guidance on complete descriptions and model numbers.
- Close the room and storage gaps. Work room by room, then check closets, cabinets, cupboards, drawers, garages, and sheds. A wide view can establish location, while close-ups document unique items and condition. If a room has no affected contents, record that fact instead of leaving the room absent from the file. This makes the scope easier to audit against the property.
- Prevent orphaned photos. Every image should connect to a room and a specific line item, with a consistent reference or naming convention. A folder of JPEGs is not a searchable, auditable inventory. Keep the inventory and its photographs together, and preserve a copy away from the premises or in cloud storage. University of Minnesota inventory guidance recommends maintaining current copies and keeping records in more than one location.
- Run duplicate and value checks. Search the working record for repeated descriptions before submission. Then confirm that each replacement value has a source, such as an available receipt or documented replacement research. Unsourced replacement costs often create follow-up requests from adjusters. Do not turn an estimate into an asserted fact simply because a similar item appeared elsewhere in the file.
- Apply age and depreciation consistently. Record known purchase context, age, condition, and supporting records. Use the same documented approach for comparable items, and flag uncertain details for review. Inconsistent depreciation within an item category can trigger revision requests.
- Hold the human review gate. Do not treat photo-derived descriptions, makes, models, or values as final. AI can miss an item or misread an image, so a technician or estimator must correct unclear output before delivery. Do not dispose of property prematurely; follow the assigned adjuster's direction and preserve available evidence.
Pre-submission checklist
- Every affected room and storage area is accounted for.
- Each line has a specific description, location, condition, and status.
- Photos are linked to the correct line items, with no orphaned or duplicate images.
- Model or serial details, when available, are recorded accurately.
- Values have supporting records or documented research, and age and depreciation are consistent.
- Unclear AI output, omissions, unusual quantities, and unresolved cause details are flagged for human review.
- The file is searchable, backed up, and formatted according to the adjuster's confirmed requirements.
Frequently Asked Questions
How should a contractor make an itemized list for an insurance claim?
Work room by room and create one line for each item or consistent group of identical items. Include the location, quantity, specific description, make, model or serial number when available, age, condition, damage observations, status, and linked photo references. Add purchase records, receipts, or replacement-cost research when available. A detailed description with model and serial numbers gives reviewers a clearer record than a folder of unlabeled images. (University of Minnesota Extension)
What photos should support a contents claim?
Start with wide room views, then capture individual items and close-ups of identifying details or damage. Open closets, cabinets, cupboards, and drawers, and include storage areas such as garages or sheds. Link each image to the corresponding line item and keep the sequence understandable. Requirements vary by carrier, so confirm any required photo set with the assigned adjuster. (Texas Department of Insurance)
What parts of the investigation should an adjuster-facing report document?
Document the item's existence, location, observed condition, apparent cause or scope connection, valuation support, age, and depreciation inputs. Keep separate what the team observed from what still needs adjuster or policy direction. Record unresolved questions, affected status, and the evidence supporting each line. Do not discard damaged property before receiving the appropriate adjuster direction.
How can household contents documentation remain useful after the job?
Keep the inventory searchable, current, and backed up outside the property or in secure cloud storage. Update it after major purchases and preserve receipts, manuals, photos, and other supporting records. An accurate inventory helps an insurer evaluate a claim, but the assigned agent or adjuster should confirm the documentation needed for the specific policy and loss. (National Association of Insurance Commissioners)
Get started with a clearer contents workflow
When documentation is consistent from the first room walkthrough through final report delivery. Your team can spend less time filling gaps and responding to avoidable follow-up questions. iCat can help restoration contractors organize item details. Evidence, and status updates into a reviewable contents record. Carrier and policy requirements still vary, so confirm submission expectations with the assigned adjuster. To explore iCat's contents management workflow, call 1-888-494-4228 and talk with the team.